Customization
Customize the appearance of your chatbot widget.
Follow these steps to customize the appearance of your YourGPT chatbot widget to match your brand and preferences.
Navigate to Widget Settings
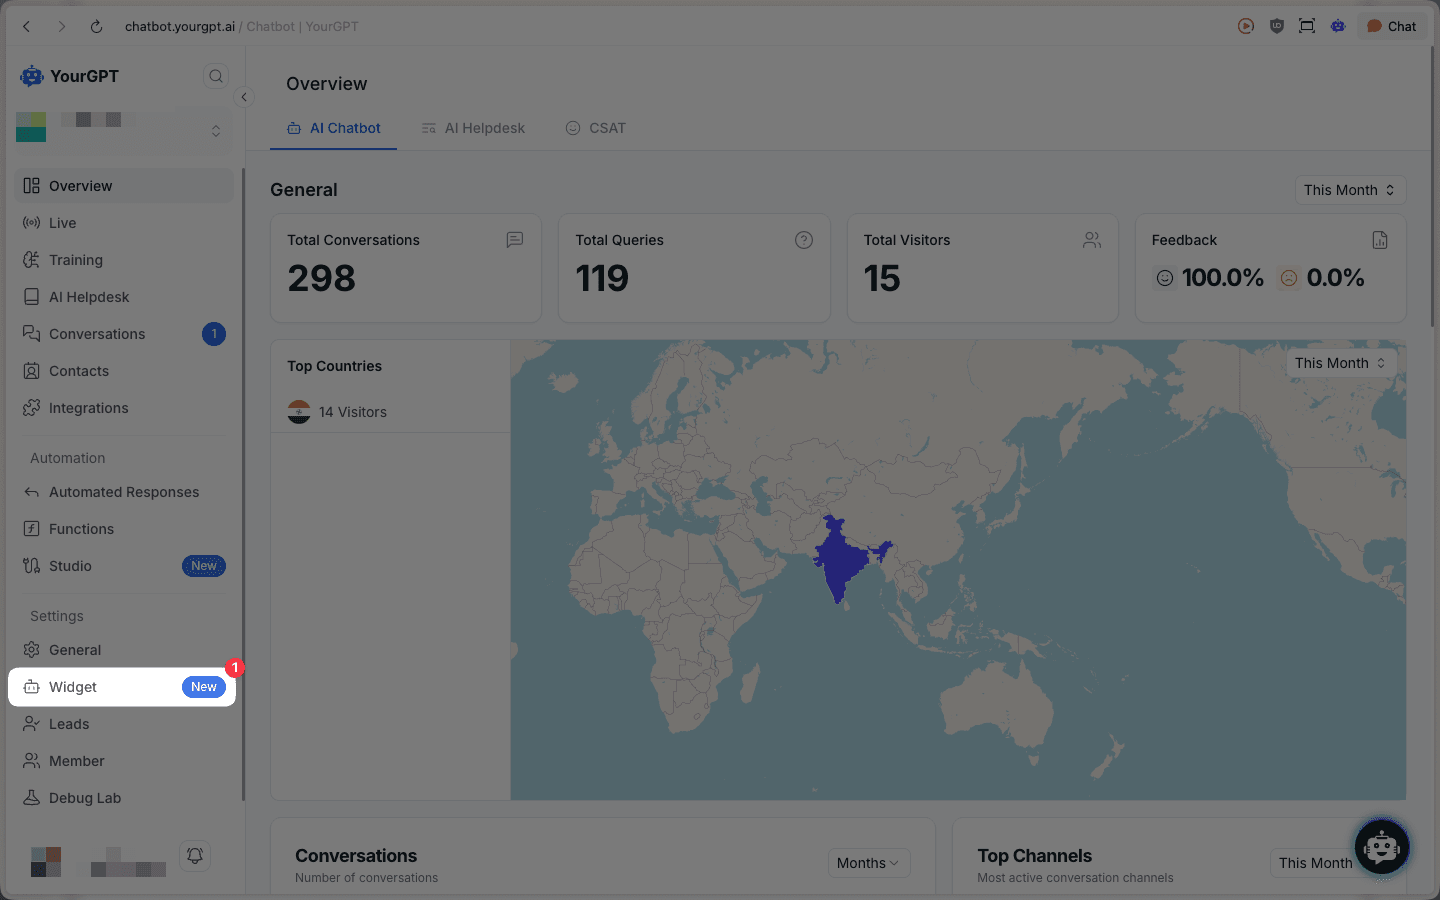
From your YourGPT dashboard, locate the Settings section in the left sidebar. Click on the Widget menu item to access the widget customization interface.
Choose Theme and Layout
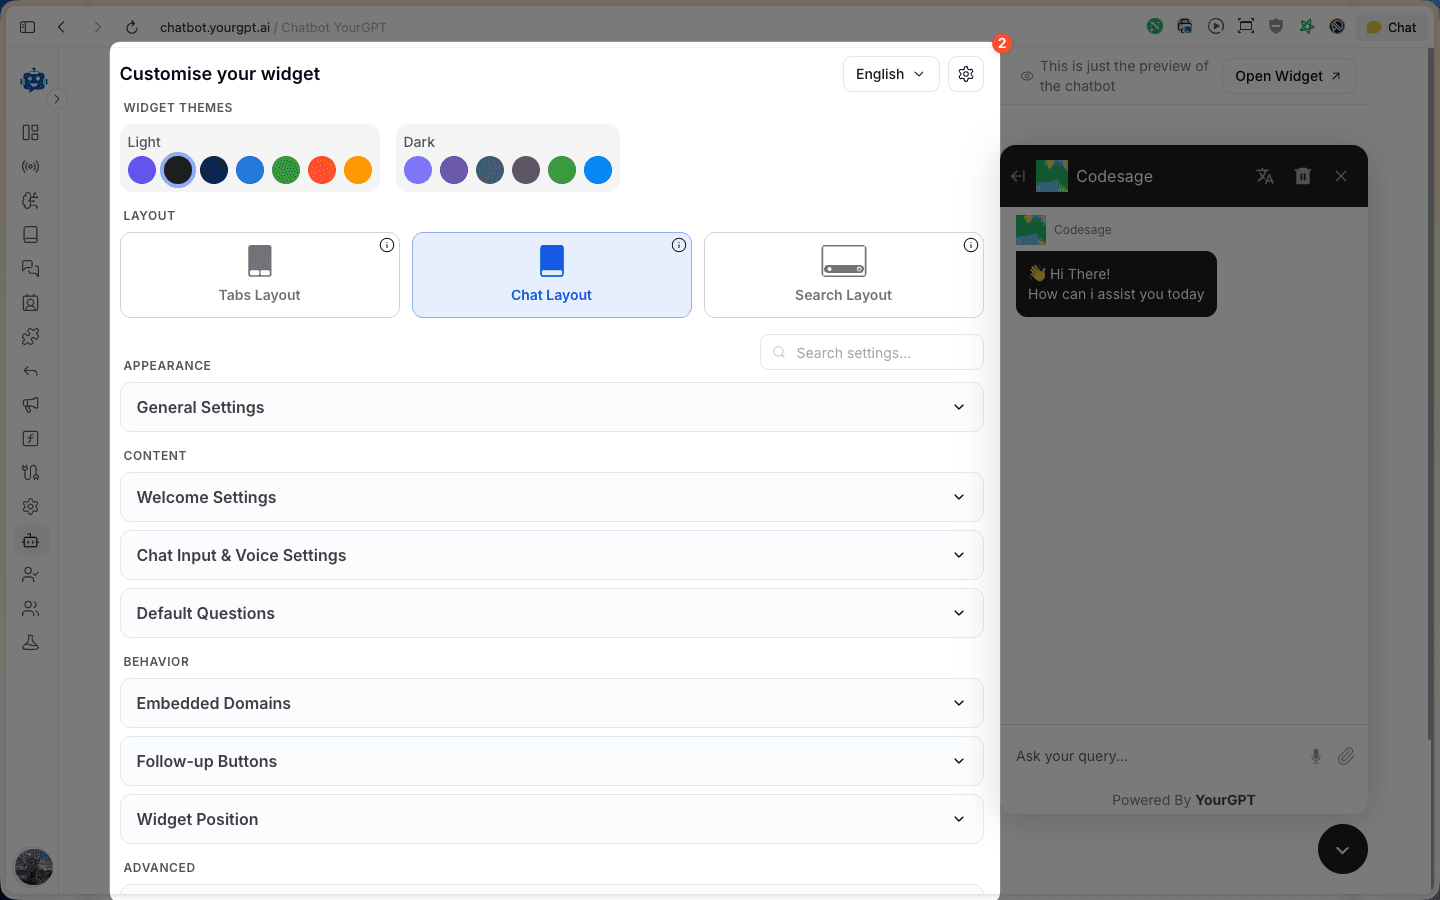
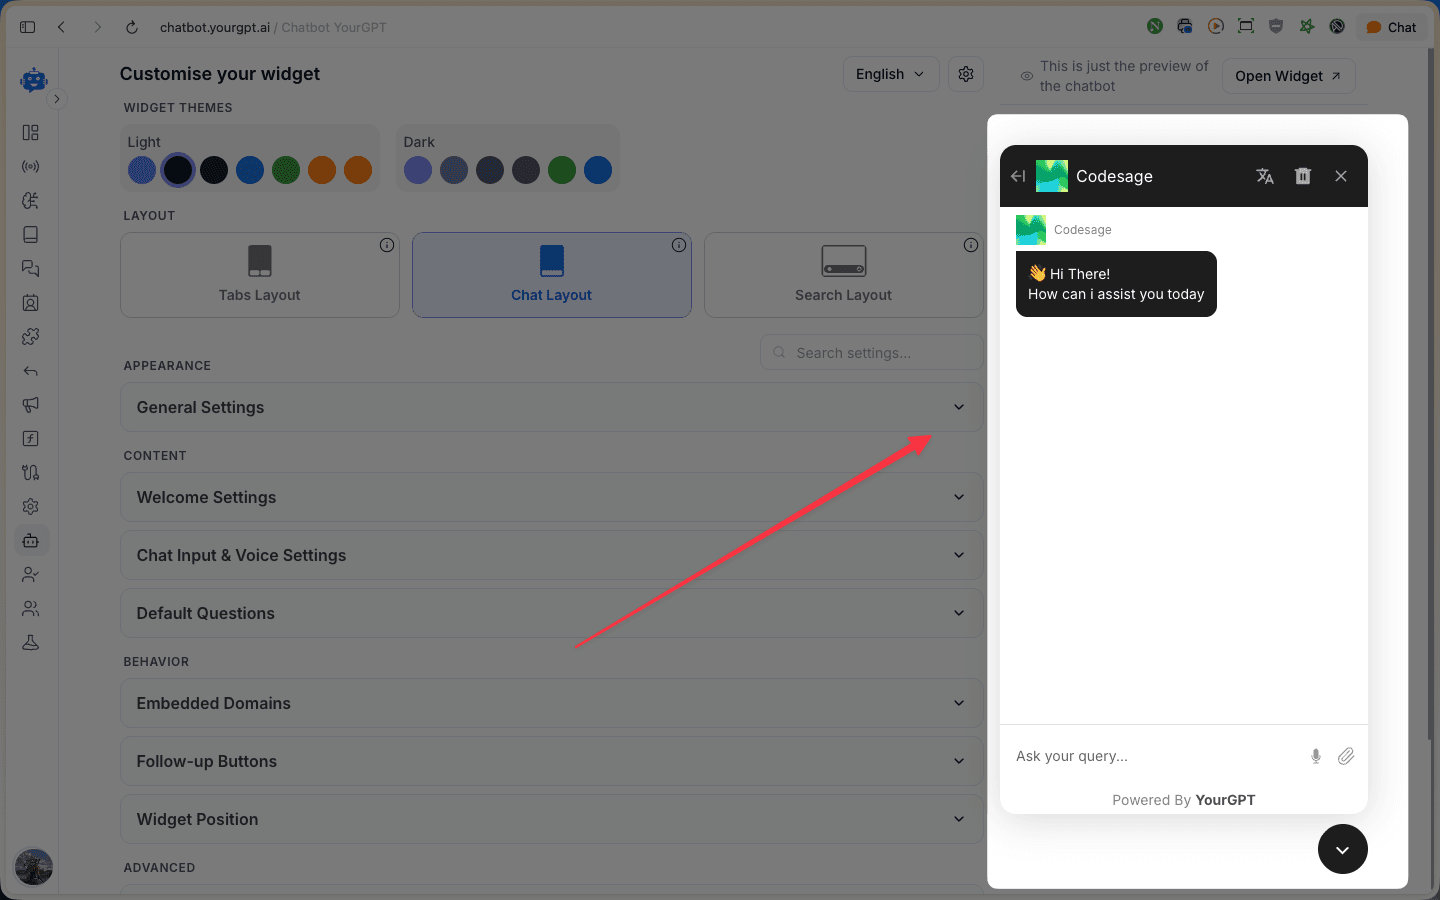
On the "Customise your widget" page, you'll see a live preview of your chatbot on the right side. Configure the basic appearance:
- Widget Themes: Select between Light or Dark themes, with multiple color presets available (Purple, Black, Navy, Blue, Green, Orange, Yellow, and more)
- Layout: Choose between:
- Tabs Layout: Create a personalized homepage for your visitors
- Chat Layout: Quick chat system with minimal elements
- Search Layout: Lightweight search-focused interface for quick information retrieval (New)
Configure General Settings
Expand the General Settings section to customize your chatbot's core appearance:
- Logo: Upload your custom logo image
- Chatbot Name: Set a name for your chatbot
- Stream AI Response: Enable or disable streaming text in AI responses
- Primary Color: Choose your brand's primary color
- Text on Primary Color: Set the text color for optimal contrast

Explore All Customization Sections
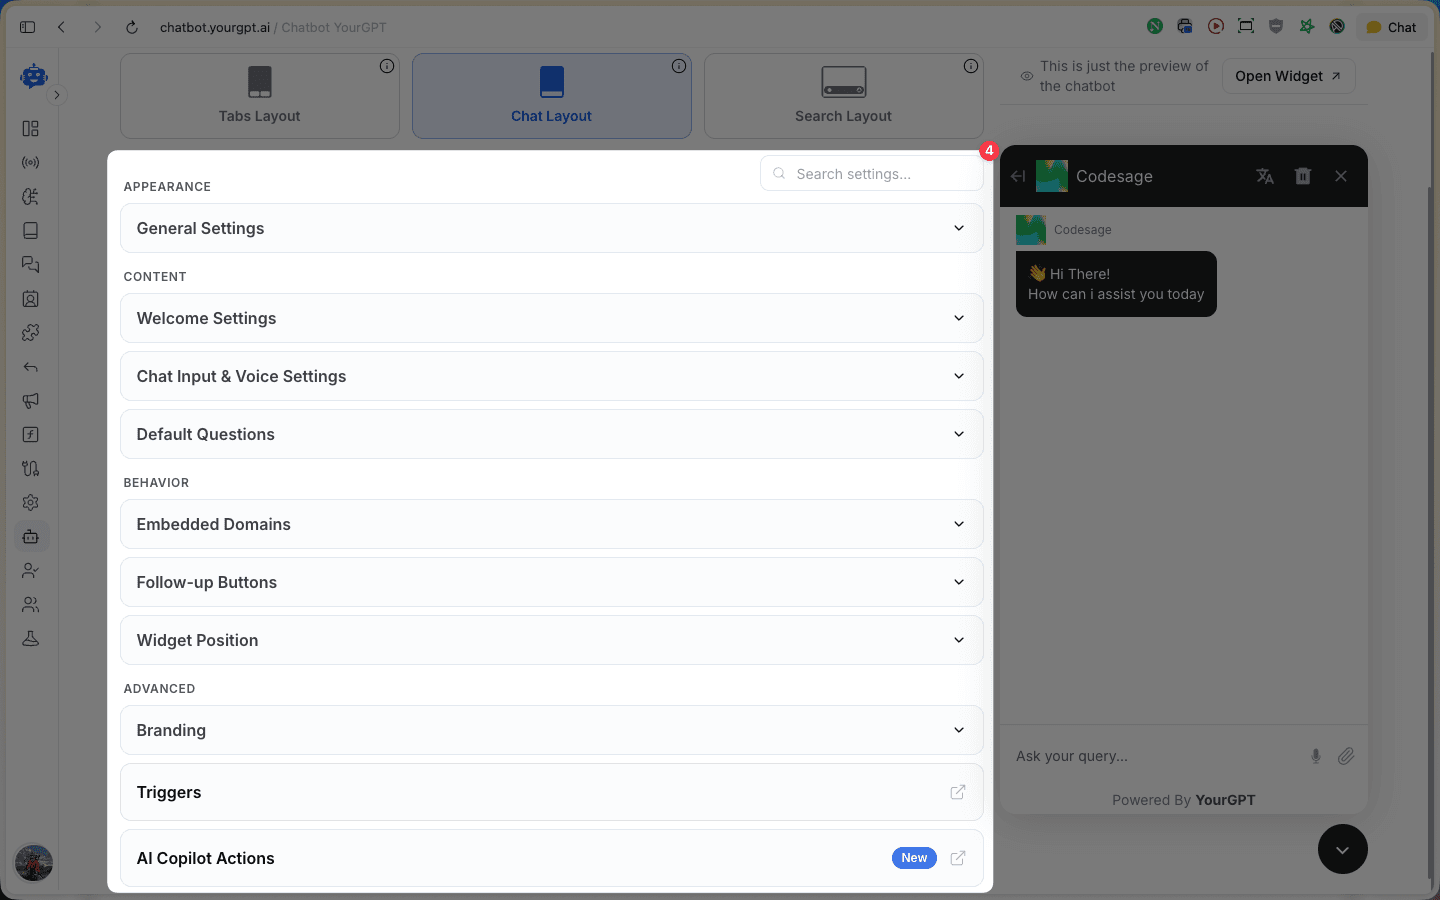
Review all available customization sections to personalize your widget further:
- Welcome Settings - Configure welcome messages and initial greetings
- Chat Input & Voice Settings - Customize input field and voice features
- Default Questions - Set up pre-defined questions for users
- Home Screen Elements - Manage elements displayed on the home screen
- AI Helpdesk - Configure AI helpdesk features
- Embedded Domains - Manage domains where the widget can be embedded
- Follow-up Buttons - Add and customize follow-up action buttons
- Widget Position - Control where the widget appears on your site
- Branding - Additional branding customization options
- Triggers - Set up automated triggers for the widget
- AI Copilot Actions - Configure AI Copilot features (New)
Preview Your Chatbot
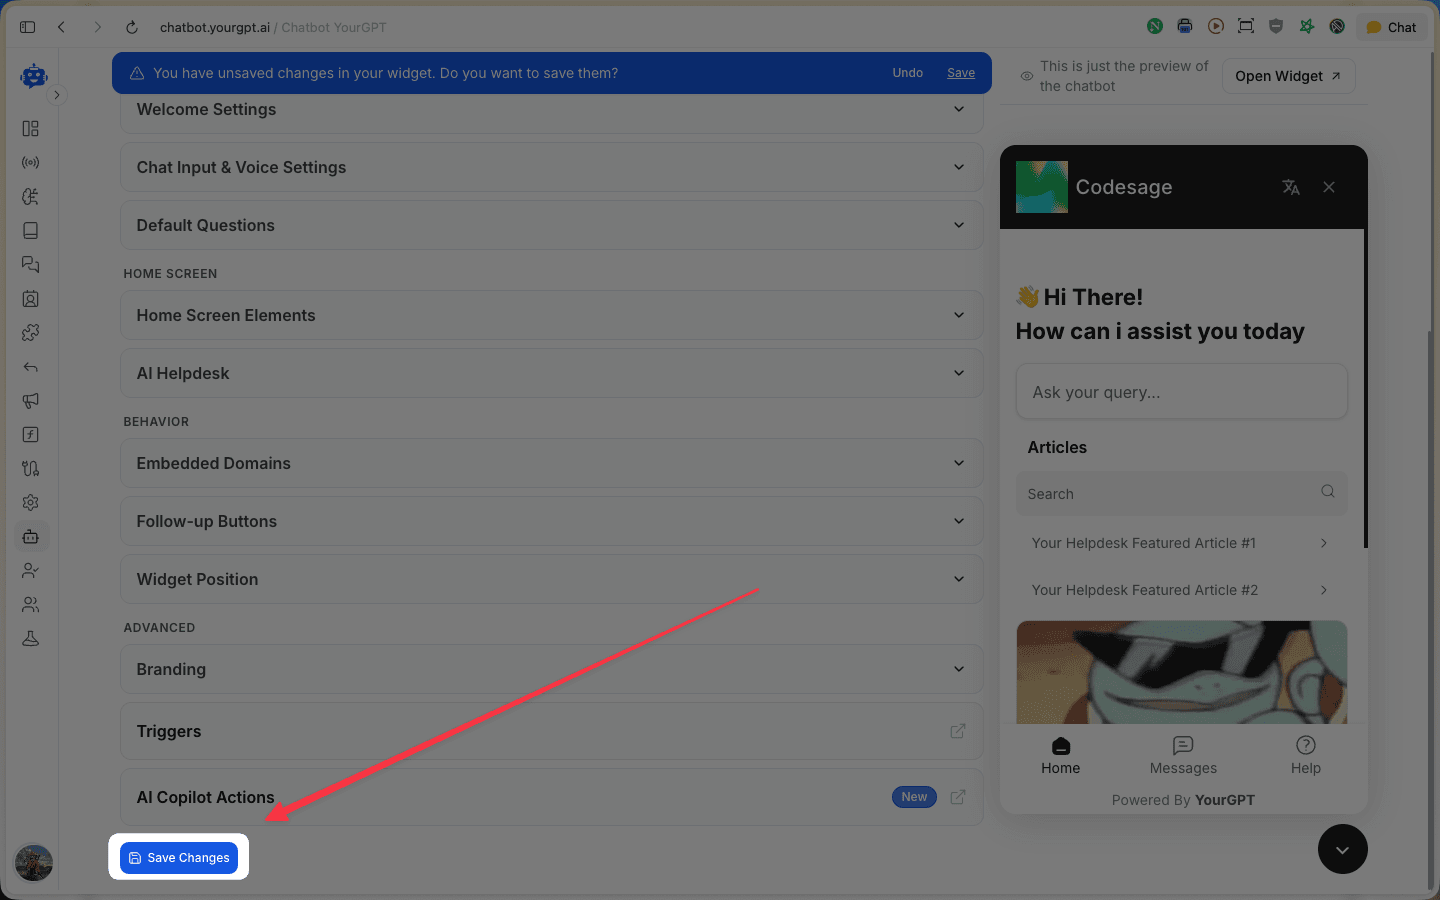
View the live preview of your chatbot on the right side of the page to see how your customizations look in real-time. The preview updates as you make changes to the settings.
Save Your Changes
After making all your desired customizations, click the Save Changes button at the bottom of the page to apply your modifications. Your chatbot will now reflect the new appearance settings.
Route-Based Widget Layout
Display different widget layouts on different pages of your site by mapping URL patterns to specific layout types. This lets you show a Search layout on documentation pages and a Tabs layout on support pages — all from a single chatbot instance.
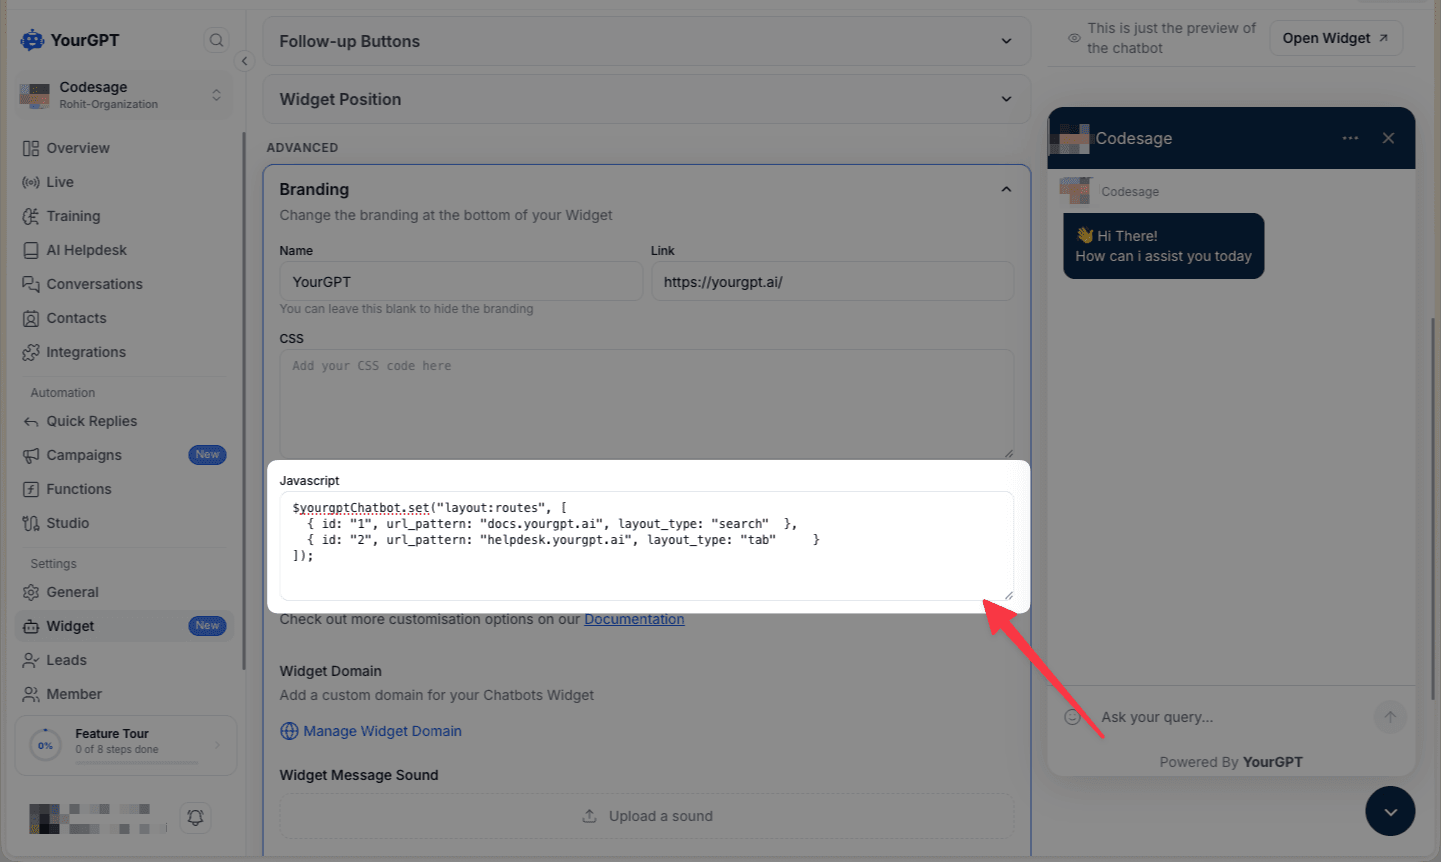
Use the $yourgptChatbot.set("layout:routes", [...]) method after your embed script to define the rules:
$yourgptChatbot.set("layout:routes", [
  { id: "1", url_pattern: "docs.yourgpt.ai", layout_type: "search" },
  { id: "2", url_pattern: "helpdesk.yourgpt.ai", layout_type: "tab" }
]);
Each route rule has three fields:
| Field | Description |
|---|---|
id | Unique identifier for the rule |
url_pattern | Hostname or URL substring to match against the current page URL |
layout_type | Layout to display — "search", "tab", or "chat" |
Rules are evaluated in order. The first matching url_pattern wins, so place more specific patterns before general ones.